As you can see from the right corner of the PC Power, there are various power plans which are Balanced, High performance, Power saver and Custom plan. You may wonder how this custom plan comes with Windows 10?
These power plans on your PC are used to manage all the power settings related to all hardware and system settings on Windows 10.
Contents:
- Why Would You Like to Create a Custom Power Plan?
- How to Create a Custom Power Plan for Windows 10?
- What are the differences between Balanced, High Performance and Power saver?
- How to List the Available Power Plan on Windows 10?
- How to Deploy the Custom Power Plan to Windows 10?
Why Would You Like to Create a Custom Power Plan?
There are mainly three cases where you would like to specify or deploy a new power plan for your PC. The one is when your power plan has disappeared after the Creators Update. The other one is you feel like to customize a power plan which meets your requirements and preferences on Windows 10. Thirdly, if your power plan such as advanced power plan always changes itself.
Now go with the following way to set a custom power plan for yourself.
How to Create a Custom Power Plan for Windows 10?
To set up a power plan for Windows 10, you can never avoid the Power and sleep settings where you are enabled to change all the sleep or power settings on your computer.
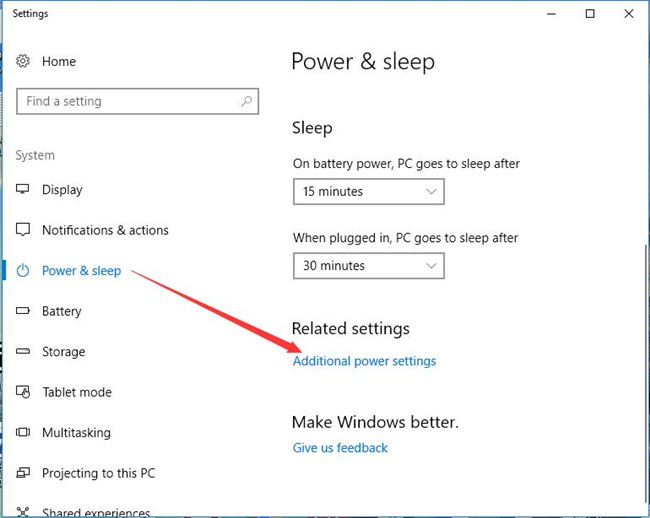
1. Go to Start > Settings > System.
2. Under Power & sleep, choose Additional power settings.
3. On the popping up window, click Create a power plan.
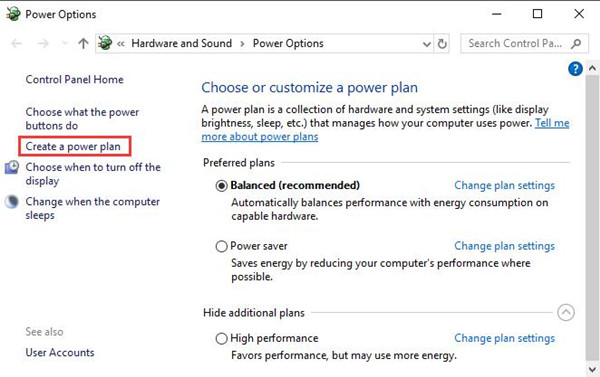
Here in this window, you can see the normal existing power plan — Balanced, High performance and Power Saver.
4. Then under Start with an existing plan and give it a name, tick the option for a power plan, here choose Balanced(recommended).
And Under Plan name, type in a custom name for your new power plan. Here input My Custom Plan 1.
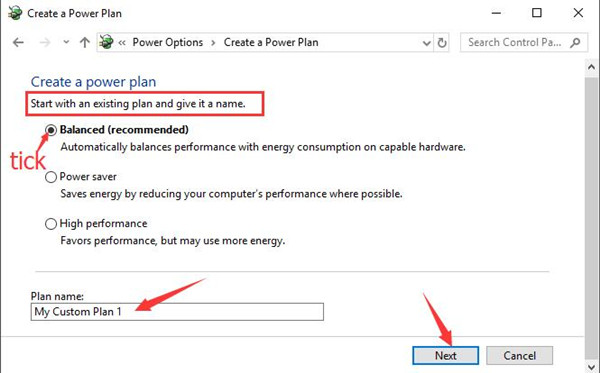
After that, Click Next.
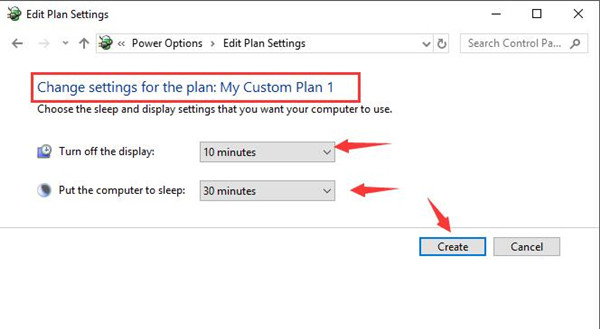
5. In Change settings for my plan: My Custom plan 1, Choose the sleep and display settings that you want your computer to use and then hit Create to set up this new power plan.
6. Once you stroked Create, on the following screen, you can see your newly created power plan. Here is My Custom Power plan 1.
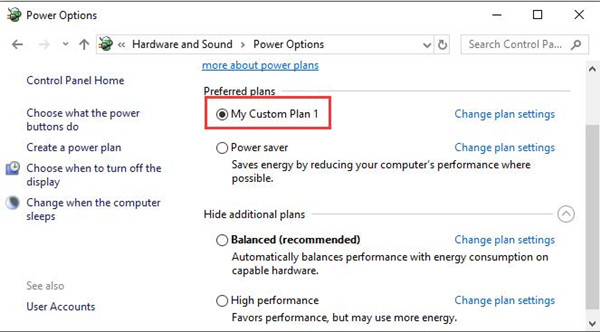
With the new power plan, your power settings are the most suitable for you on Windows 10.
In this part, to customize your power plan, you are supposed to change some advanced power settings.
From what you have done to set up or create a power plan, you may be extremely confused about what you are to choose from the existing power plan, namely Balanced, High performance and Power Saver.
Now move on to figure out the differences between them.
What are the differences between Balanced, High Performance and Power saver?
These three are all the existing power plans deployed by Windows 10. Though the recommended one is Balanced, there are also some users would rather activate the High performance or even power saver plan for their PC.
If you have no idea about what their advantages and demerits are on Windows 10, you might as well refer to the part below to know more about them.
Balanced — the Default power plan setting. It can greatly speed up your CPU on Windows 10. It is the most popular among Windows 10 users.
High Performance — In contrast with Power Saver, High Performance power plan would not only increase the brightness of your desktop display but also will not prevent any apps from working in order to save power.
Power Saver — It lowers display brightness and limits software and hardware activity to extend your battery life, so it is rather useful when your battery falls low on Windows 10.
However, it is only the most suitable power plan that best satisfies you on Windows 10.
Therefore, you would be suggested to select the power plan fits your PC.
How to List the Available Power Plan on Windows 10?
Having been familiar with the distinctions between these power options, for some novices, if you even do not know if they accessibly are for you, there is also a way out, you can choose to show all the available ones in the command prompt, such as the created custom power plan on Windows 10.
1. Press Windows + R to activate the Run box.
2. Type in cmd in the box and hit Enter to open the Command Prompt. Here you must make sure you are logging on to Windows 10 as administrator.
3. Input powercfg–LIST in the Command Prompt and press Enter to perform it.
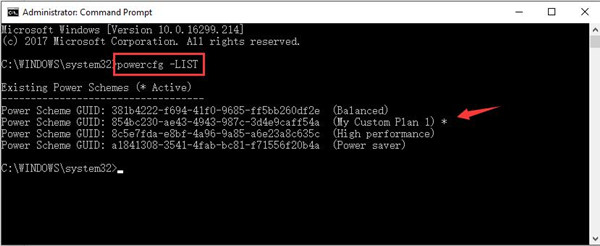
Then you are capable of seeing all the power plan you can set to your PC, including Balanced, Custom power plan, High Performance, and Power Saver.
On the above screenshot, you can also notice the GUIDES next to the power plans.
Once you found the available power plan for Windows 10 on your PC, it is advisable that you manage to deploy or export the customized power plan to the computer.
How to Deploy the Custom Power Plan to Windows 10?
Now that you have already created a brand-new custom power settings for Windows 10, why not export it to your computer to execute it?
To finish this action, obey the following steps.
In Command Prompt, type in the command below:
powercfg -EXPORT C:\Your Custom Plan name.pow {guidPlan-New}
Here the Custom power plan is My Custom Plan 1.

Then hit Enter to run this command on Windows 10.
After that, you would be able to make this new custom power plan manage your related power settings on Windows 10.
In a word, in this post, you will learn about how to set up or modify the power plan on Windows 10 and then optimize this plan. And only in this way can your newly created power plan be most suitable for Windows 10.
More Articles:
[Solved] Allow Computer to Turn Off This Device to Save Power Grayed Out