
Imagine that, when you are working on something with your computer o Windows 10, but all of a sudden, your PC goes into update without any sign. You even have no preparation to save your documents. Windows 10 just updates itself automatically.
Will you be upsetting about the story?
Have you tried to turn off the automatic Windows update for Windows 10, but failed?
Now for the purpose of removing your doubts, this article would focus on teaching you how to stop Windows 10 from automatically updating.
How to Stop Windows Auto Updates on Windows 10?
In order to manage Windows 10 auto updates, ways offered in this passage are the most powerful and effective ones, which would involve Windows update service, network connection, local registry editor, the group policy and Device installation settings.
Why not try these methods to disable the auto Windows updates at once?
Solutions:
1: Disable Windows Update Service
2: Set Metered Network Connection
3: Edit Group Policy to Stop Windows Auto Update
4: Use Registry Editor to Stop Windows Updates
5: Disable Automatic Device Installation
Solution 1: Disable Windows Update Service
If you merely want to turn off the Windows update for Windows 10 for some time and feel like to enable it someday, this choice is suitable for you.
Actually, Windows update is one of the system processes in Windows systems. In this way, it is accessible for you to disable this service so as to turn off the automatic Windows 10 update on your PC.
1. Hit the combination key Windows + R to activate the Run box.
2. In the box, type in services.msc and then click OK to open Services window.
3. In Services, scroll down to pinpoint Windows Update and right click it to get into its Properties.
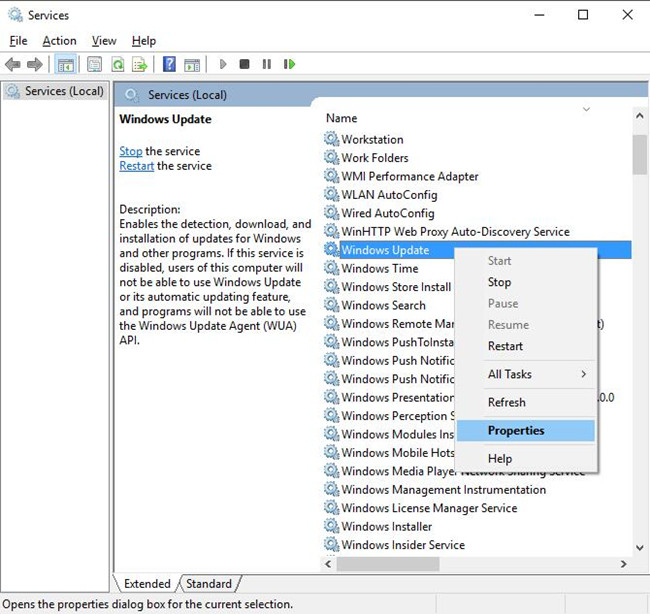
4. In Windows update Properties, locate Startup type and set it as Disabled. And then stroke OK to save changes.
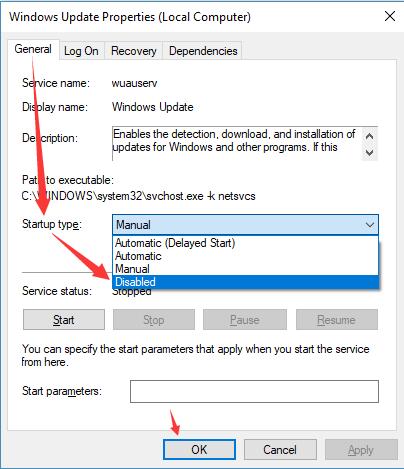
5. Restart your PC.
Now your computer won’t update automatically for Windows 10.
However, once you would like to enable Windows automatic update, you can repeat step 1 to step 4 and make the Startup type Automatic in step 5.
Solution 2: Set Metered Network Connection
To stop Windows 10 from downloading and installing updates for itself, you can also determine to control the network and internet connection.
Nevertheless, only if you are using WIFI can you take this measure to disable the Windows 10 automatic update. As the Ethernet network data volume is unlimited, there is no need for you to set a data plan for it so as to auto update on Windows 10.
1. Go to Start > Settings > Network & Internet.
2. Under WIFI, click the WIFI connection on your PC.
3. Then choose to Set as metered connection for the WIFI network.
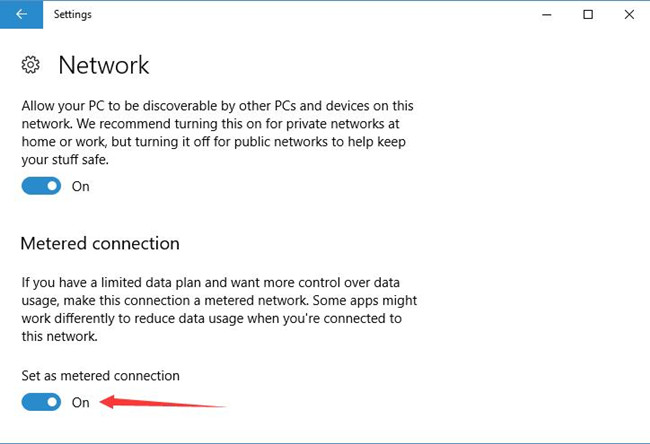
Here once you made this choice, some apps might work differently to reduce data usage when you are connecting to this network.
Therefore, the Windows update would also be turned off if the network data is limited on Windows 10.
Solution 3: Edit Group Policy to Stop Windows Auto Update
For Windows Pro or Education users, it is also feasible for to edit group policy for Windows Update to stop it from updating automatically. With the change made in group editor, you can receive notification next time Windows 10 needs updating.
1. Type in Group Policy in the search box and press Enter to open the Local Group Policy.
2. In Group Policy, go to Computer Configuration > Administrative Templates > Windows Components > Windows Update.
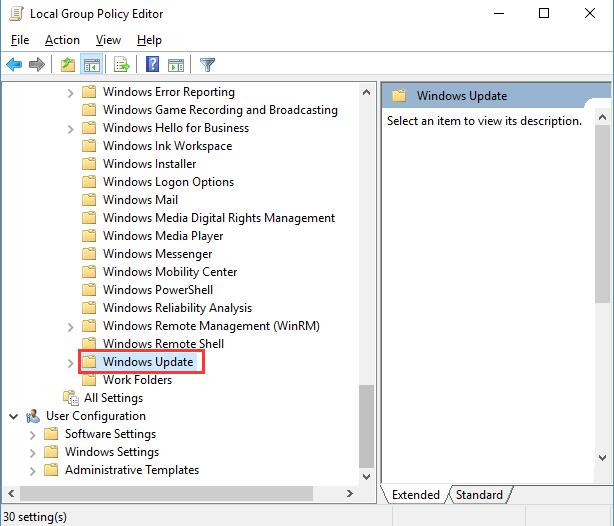
3. Choose Windows Update and then in the right pane, select and right click Configure Automatic Updates to Edit it.
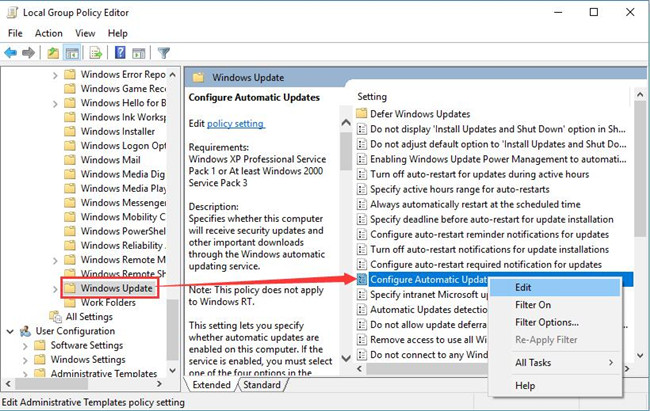
4. In Configure Automatic Updates window, decide to set it as Disabled and then click Apply and OK to take effect.
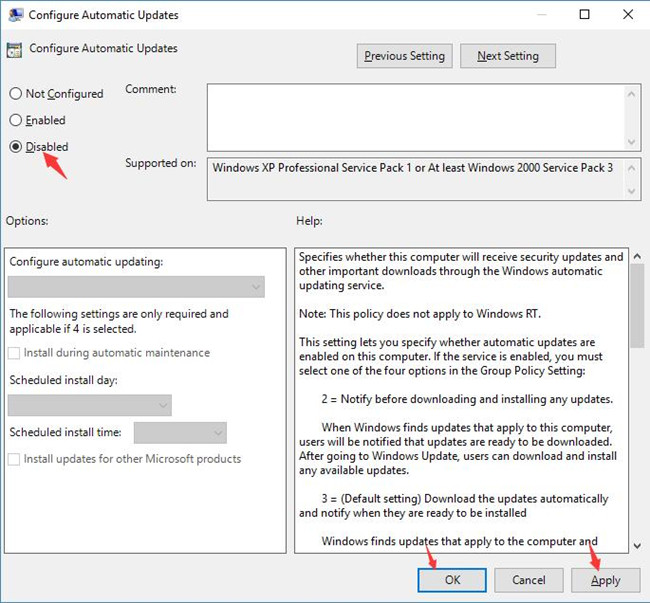
You will have disabled Windows update completely for Windows 10.
But if you would rather turn it on in the future, fortunately, it is also available to refer to the steps above to set it as Enabled.
Solution 4: Use Registry Editor to Stop Windows Updates
Alternatively, you might also be qualified to change the key for Windows update in registry editor so that the automatic Windows Update is managed to disabled.
While before you execute this action, you are supposed to back up the important resources in case of unnecessary loss of data.
1. Stroke Windows + R to evoke the Run box.
2. Then input regedit in the box and hit OK to open Registry Editor.
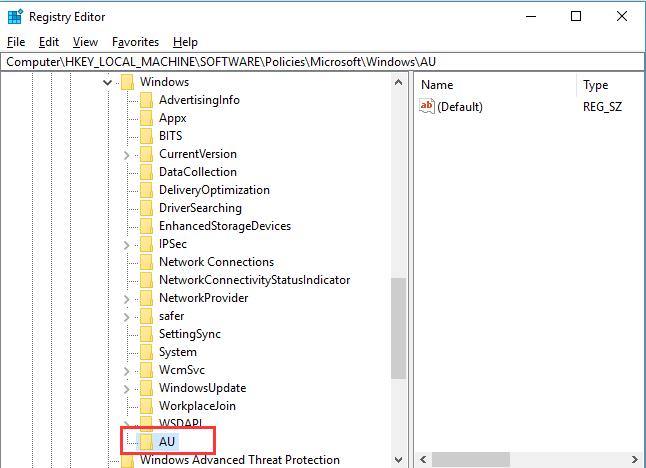
3. In Registry Editor, go as the path: HKEY_LOCAL_MACHINE\SOFTWARE\Policies\Microsoft\Windows
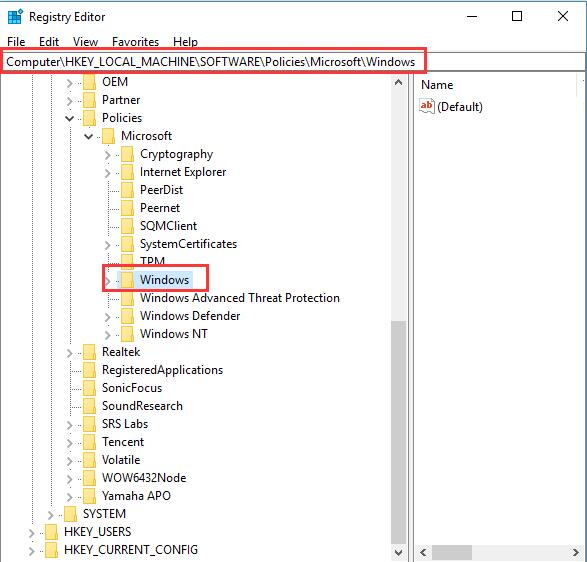
4. Right click Windows and then choose New and then Key.
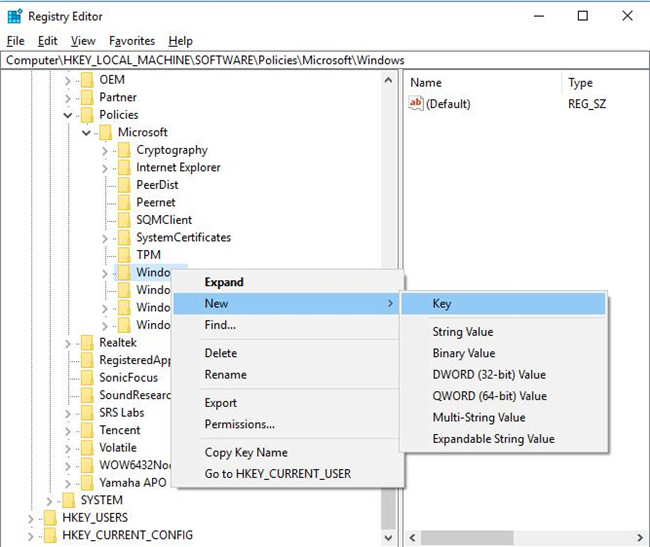
5. Then name the new key below as AU and press Enter to take effect.
6. Under AU, on the right pane, right click the black place to create a New DWORD (32-bit) Value.
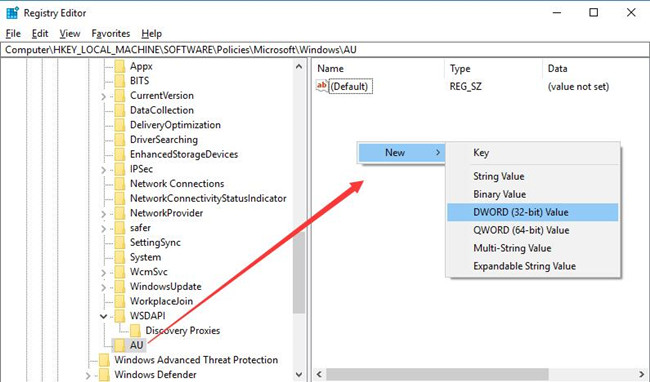
7. Name the newly created DWORD(32-bit) Value as AUOptions.

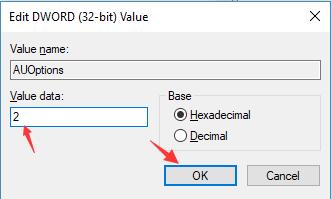
8. Double click the AUOptions to Edit DWORD (32-bit) Value and set its Value data as 2. Then click OK to save changes.
Tips:
Here if you are to disable to stop the auto updates for Windows 10, you should set the data as 2, which is to notify for download and notify for install.
While if you make it 3, it will Auto download and notify for install.
For value 4, it would Auto download and schedule the install.
For value 5, it is to allow the local administrator to choose settings.
At the moment you turn off the registry editor, you are capable of managing the Windows updates on Windows 10 not be controlled by its being automatically updated.
Solution 5: Disable Automatic Device Installation
On Windows system, there is a Device Installation setting in control panel.
As for the aim to stop Windows 10 from automatically downloading or installing updates, once you have turned off the device installation choice, it will be achieved as well.
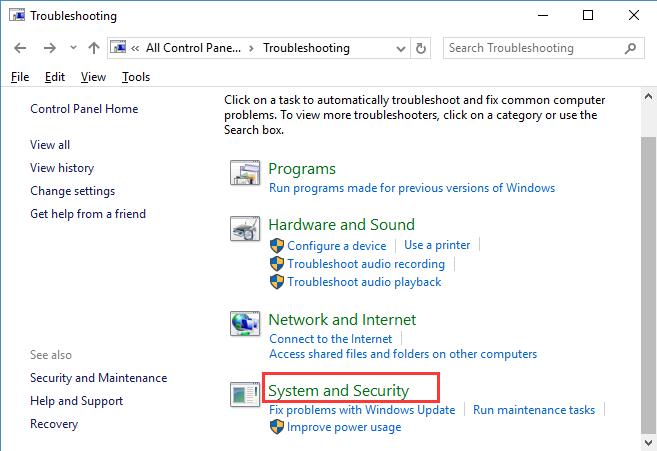
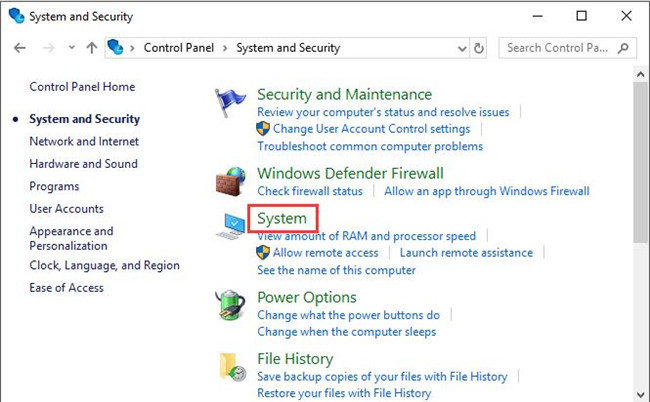
1. Navigate to Control Panel.
2. In Control Panel, pick out System and Security.
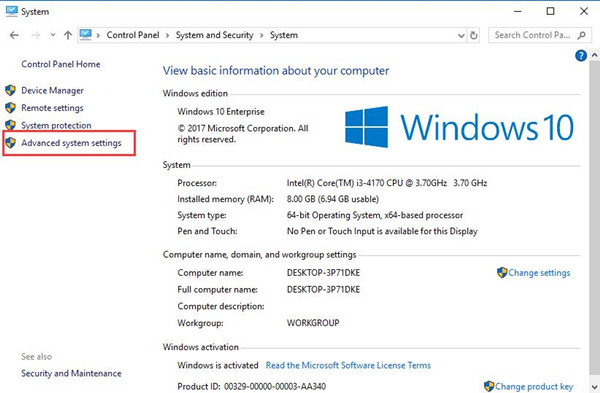
3. In the following window, select System.
4. Choose Advanced system settings.
5. Under Hardware, locate Device Installation Settings.
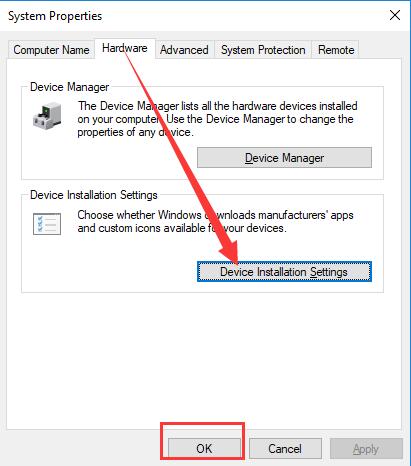
6. Tick the box for No and then click Save changes.

This option is to disable the automatic apps or programs installed on this device, including Windows updates.
Your computer will not run into auto update for Windows 10 unless you have changed the option to Yes in Device Installation settings.
All in all, this post offered five usdeful ways to turn off or stop Windows 10 automatic updates. Just choose one suiting your case and disable the Windows update automatically on Windows 10.


