Contents:
10 Ways to Fix Ntoskrnl.exe High Memory and CPU Usage
What is Ntoskrnl.exe on Windows 10?
Why Could Ntoskrnl.exe Cause High Memory and CPU Usage?
Sometimes, Windows 10 task manager shows you that Ntoskrnl.exe system process uses High Memory and CPU usage or sometimes even BSOD issues on Windows 10. To make things worse, your PC would freeze or crash due to the ntosktnl.exe error, not limited to high memory and CPU usage, ntoskrnl.exe 100% disk usage is not common.
How to Fix Ntoskrnl.exe High Memory and CPU Usage?
With deep research, this post will introduce to you how to get rid of high memory and disk usage by ntoskrnl.exe, you need to take some measures to release memory, CPU storage and fix the corrupted or problematic applications or files on Windows 10.
Solutions:
1: Run Windows Performance Troubleshooter
4: Disable Windows Search Service
6: Uninstall Incongruent Applications
7: Run Development Image Servicing and Management
9: Change ClearPageFileAtShutDown Data
10: Perform Clean Boot on Windows 10
Solution 1: Run Windows Performance Troubleshooter
Within Windows systems, there is a performance troubleshooter, which devotes to detecting what affects your computer performance, including disk, memory, and CP usage. So try to make full use of it to see what causes high memory and CPU usage of ntosktnl.exe Windows 10.
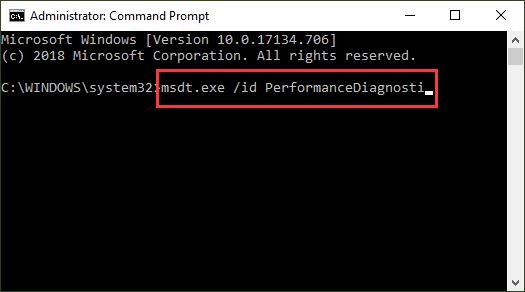
In Command Prompt with administrative privileges, copy and paste the command msdt.exe /id PerformanceDiagnosti to activate PC performance troubleshooter.
Upon it displays what makes Windows 10 freeze and stuck on ntoskrnl.exe high memory and CPU or high disk usage, go ahead to fix the ntoskrnl CPU usage issue.
Solution 2: Disable Startup Settings
Many users are fond of enabling some programs to start up as the computer has just logged on. However, it can bring much memory or disk usage on Windows 10. Under this circumstance, make best of your efforts to turn off some startup settings.
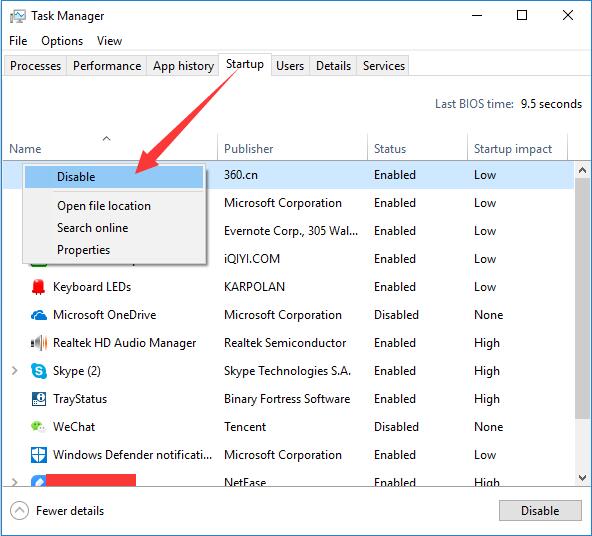
1. Right click Start and select Task Manager from these options.
2. In Startup tab, right click the software or programs you hope to Disable from starting as long as the PC is logging on.
To fix the memory leaking and high CPU usage problem caused by ntoskrnl.exe process, you need to do more besides turning off some startup settings.
Solution 3: Update Device Drivers
As it shows you that driver incompatibility can be a main reason why you met with the memory leaking and high disk usage problem in Windows 10. You might as well update all of them to fix this disk issues.
But to your knowledge, updating all the drivers can be rather troublesome and time-consuming, so here you might as well use Driver Booster. It can be a great helper for you if you want to download all the drivers for Windows 10 as to fix high CPU and disk usage caused by ntoskrnl.exe system. With Driver Booster, you are able to update drivers very quickly and smoothly.
1. Download Driver Booster on Windows 10.
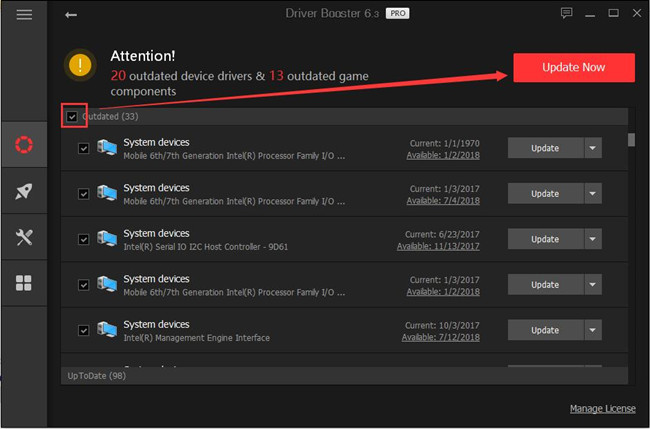
2. After installing and running it, click Scan to look for problematic drivers.

Then from the scanning result, you can apparently see which drivers are missing, which drivers are corrupted, and what drivers need to be updated.
3. You can Update Now to update all these drivers once for all.
When Driver Booster downloaded and updated drivers for you, you find that your computer run more smoothly as high memory, CPU or disk usage by ntoskrnl.exe has been removed from Windows 10.
When Driver Booster download and update drivers for you, you find that your computer not only run more smooth but possesses more disk storage on Windows 10.
Solution 4: Disable Windows Search Service
Since you have come across the trouble with high CPU and disk usage on Windows 10, either when you find it in task manager or you cannot perform any application as it is in full disk and CPU storage, Windows search can be an undeniable cause of this disk issue. If you have no need of it, choose to disable it when necessary.
1. Press Windows + R to enter the Run box.
2. Enter services.msc in the box. And Click OK to navigate to Services window.
3. Scroll down to find out Windows Search and then right click it to open its Properties.
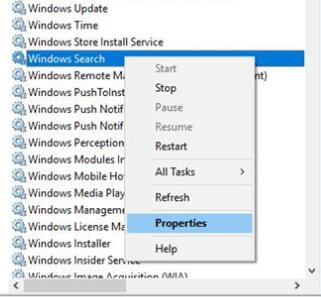
4. Under the General tab, locate Startup type and choose Disabled. Then click OK.
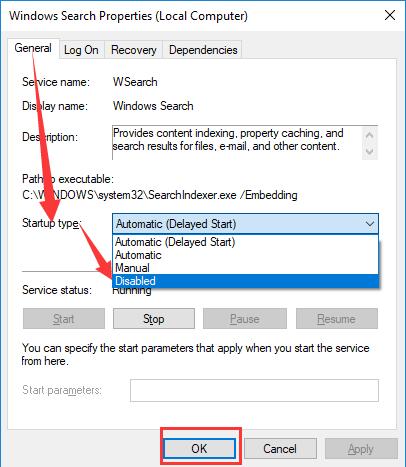
Under this circumstance, when you reboot your PC, Windows Search would not start running on Windows 10. And if it is the case, you would find you have temporarily solved the high memory and CPU usage problems.
More: 7 Ways to Fix Searching Not Working on Windows 10
Solution 5: End Runtime Broker Task
It is said that Runtime broker, a system process which would occupy too much memory, sometimes even run out of your RAM when there are any faulty applications on Windows 10. Accordingly, when you open task manager and check the rate that Runtime Broker has occupied in CPU usage. You may choose to stop it from working to spare more space to resolve the high memory and CPU usage issues.
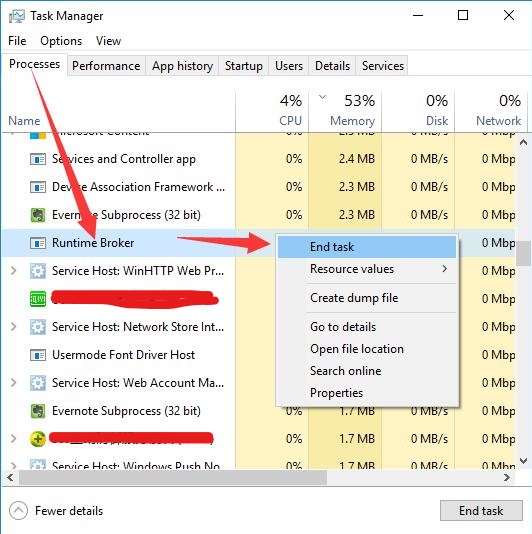
1. Right click Task Manager from Start menu.
2. Under Processes, locate Runtime Broker and right click it to End Task.
It may be a good choice for some Windows 10 clients to turn off Runtime Broker task for Windows 10. But what if it fails to fix your high CPU and memory storage problem.
Solution 6: Uninstall Incongruent Applications
On some conditions, you noticed that the Ntoskrnl high CPU comes up soon after a certain program is installed on Windows 10, if it is the case, maybe you need to uninstall the incompatible programs to avoid high disk usage hogged by it.
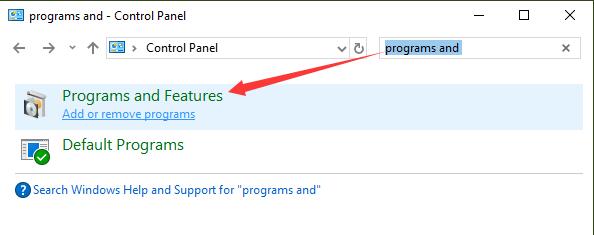
1. Open Control Panel.
2. Search programs and features in Control Panel search box and then bound for Programs and Features window.
3. Then in Programs and Features, locate the software and right click it to Uninstall.
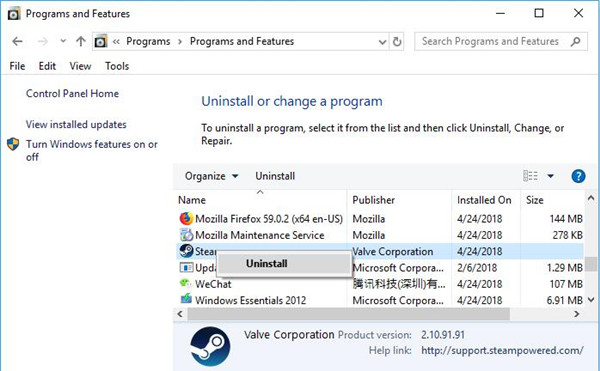
4. Restart Windows 10 to take effect if possible.
Upon the incompatible program is removed from your PC, you can check in take manager whether the ntoskrnl.exe high CPU usage persists.
Solution 7: Run Development Image Servicing and Management
Just as you have been introduced, Ntoskrnl.exe is one of the files. Therefore as your PC bumped into the high CPU usage and memory leaking issues tempted by this ntoskrnl.exe, utilize the built-in tool–DISM on Windows 10 to fix system file corruptions and offer services for online and offline Windows images.
1. Open Command Prompt from the search box.
Here you are to right click the best-matched result to Run as administrator.
2. In Command Prompt, enter the command as below.
DISM.exe /Online /Cleanup-image /Restorehealth
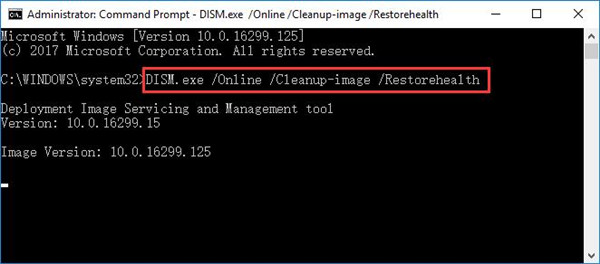
Then stroke Enter to execute this command.
Tips: When you are running this command, but to find it provides you files that need to fix system corruptions when the Windows updates are not available, maybe you are supposed to copy and paste the following command to activate a Windows installation as a repair tool.
DISM.exe/Online/CleanupImage/RestoreHealth/Source:C:\RepairSource\Windows /LimitAccess
Maybe when you have run this command for several times, Windows 10 no longer has the high disk and memory issue.
Solution 8: Run System File Checker
System File Checker is a Windows 10 utility used to scan for corrupted files. Whenever you have taken the solution above but to no avail, it is accessible for you to use SFC tool on Windows 10 to fix this file caused CPU storage problem on Windows 10.
1. Open Command Prompt and choose to Run as administrator.
2. Run the command sfc / scannow at Command Prompt.
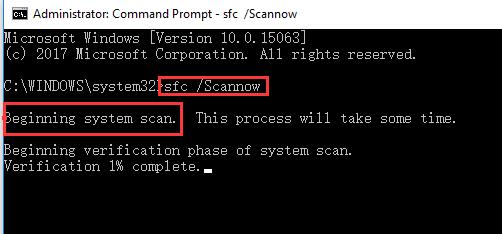
As you hit Enter, SFC tool would begin scan for Windows 10 for corrupted files.
This System File Checker tool will search for all the files on Windows 10, thus it would take you some time to finish this process. Maybe at some point, it can catch the corrupted ntoskrnl.exe and hence resolve the CPU and memory problems.
Solution 9: Change ClearPageFileAtShutDown Data
Now that it is the Ntoskrnl.exe that brings about the high CPU and memory usage trouble for your PC, if all the methods are useless for you, what you can do may be clearing up all the file data when you shut down Windows 10.
1. Open Run box with the combination key Windows + R.
2. Input regedit in the box and click OK to enter Registry Editor.
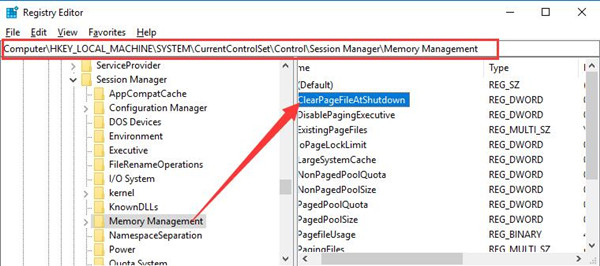
3. Go to the path:
HKEY_LOCAL_MACHINE\SYSTEM\CurrentControlSet\Control\Session Manager\Memory Management
4. Under Memory Management, locate ClearPageFileAtShutDown.
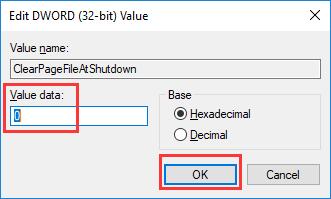
5. Right click ClearPageFileAtShutDown to Modify its Value.
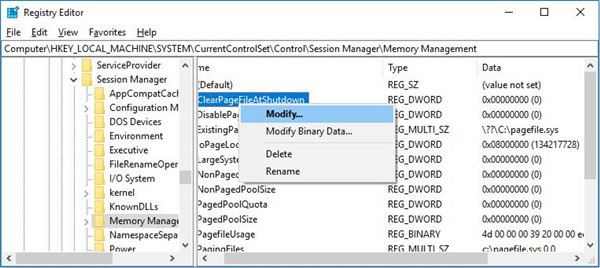
6. Change the ClearPageFileAtShutDown Value data to 0.
Restart your computer and your PC could delete all corrupted files for you, such as ntodkrnl.exe. Under this circumstance, you can see that your high memory or disk and CPU usage disappeared on Windows 10.
Solution 10: Perform Clean Boot on Windows 10
In respect of the memory or CPU high storage issue, the clean boot can be a good fix. Unlike Safe mode, if you place your computer in clean boot, it will perform with minimum drivers and startup software which can figure out if the ntoskrnl.exe gives rise to the high CPU and memory usage on Windows 10.
In a word, from this post, you can always find a way to fix the high CPU and disk usage problem for Windows 10 as long as you are capable of keeping patient. While given that you failed to use some ways to solve it, hanging on to close Windows tips or disable Superfetch may be the saver for you.
What is Ntoskrnl.exe on Windows 10?
For most of you, Ktoskrnl.exe is rather strange for you, but for the purpose of fixing this memory leaking and high disk storage problem, manage to follow this post patiently. Normally, you could see the Ntoskrnl.exe under System Details tab.
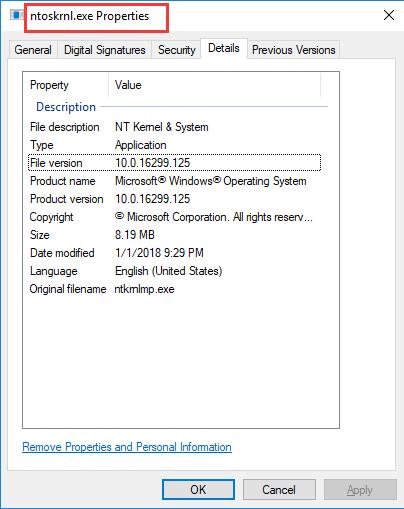
Ktoskrnl.exe, the abbreviation of Windows NT Operating system kernel, is responsible for different system services, such as process and memory management and hardware virtualization. Nevertheless, sometimes, the Ktoskrnl.exe will slow down Windows 10 by consuming RAM and CPU power.
Why Could Ntoskrnl.exe Cause High Memory and CPU Usage?
You may have little idea about how the memory processed on Windows 10. It begins as long as RAM fetches the loaded task. And then CPU will decode and transmit it to memory. The whole codling and decoding process would involve in CPU, hard disk drive, and solid-state drive and so on.
But unlike Windows 7 or 8, Windows 10 favors speed at the expense of memory for the Ktoskrnl.exe is the process using compressed memory to execute tasks and so as to compensate for the situation if the Physical Memory has been used up.
Nevertheless, this compressed memory results in much pressure for CPU. And this is why the Ntoskrnl.exe system would make your PC in high memory and CPU usage on Windows 10.
More Articles:
Fix WMI Provider Host High CPU Usage Issue on Windows 10